Connecting to a Network Drive (Mac OSX)
Connecting to Windows Servers:
Connecting to a windows server or windows shares can be done by
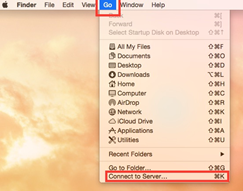
1. Making sure the finder is active (click on the desktop/ minimize or exit any applications that are running) and pressing Command + k. You can also go to “Go” and then “Connect to Server”
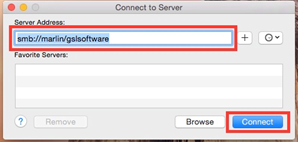
2. To connect to a windows share you’ll need to make sure smb:// is in front of the server name that you want to connect with. The “smb://” is a protocol for sharing files, printers, serial ports, and communication abstractions. This is the language that the Microsoft Windows Network runs in and enables users on Macintosh computers to share files with Windows computers. A few examples are:
a. Caddis: smb://caddis.msu.montana.edu
b. Hopper: smb://hopper.msu.montana.edu
i. Common Shares for the Student Labs are:
1. smb://caddis.msu.montana.edu/pccommon
2. smb://caddis.msu.montana.edu/pccommon/usa
3. smb://caddis.msu.montana.edu/
4. smb://hopper.msu.montana.edu/msuapp
5. smb://hopper.msu.montana.edu/labshare
6. smb://archserver2.msu.montana.edu/ (This is the share for Architecture)
3. After you’ve typed in the share hit enter or click “connect”. A dialogue box will appear allowing you to select the share you want to connect to. Select the share and click ok. This will mount the share to the desktop and display the share in a new finder window.
|
|
|